
Migrating WordPress websites is a little more challenging than it is in other systems. As an agency we deal with all kinds of WordPress development needs, from sites using no-code page builders like Elementor and Divi to hand-coded websites with custom themes, and everything in between.
In this WordPress Migration Guide, we’re going to learn how to Migrate a WordPress website from one place to another. These migration steps can be used for the following needs:
- Transferring a WordPress website from one server to another. (like if you’re switching hosts)
- Migrating a WordPress website from one domain to another on the same host.
- Moving a WordPress website from one “stage” to another in the development cycle, ex. Staging to Live, Live to Local, etc.
This guide is useful for both developers and non-developers, and takes into consideration as many potential scenarios as possible.
This tutorial is focused on gaining a better understanding of the general process, rather than which tool is the best, or how to use specific tools. Please check out some of our other related articles below for help on implementation details:
- Setting up a Staging Environment for WordPress
- Best Local Development Environments for WordPress
- Duplicator Review
- WP All In One Review
- WP Migrate DB Pro Review
- Cloudinary Review
- WordPress Version Control (for developers)
- Modern WordPress Development with Composer, Roots, and Bedrock (Advanced)
- CI / CD Integration
The Challenges of Migrating Websites in WordPress
There’s a number of challenges when it comes to migrating in WordPress that you should be aware of. If you have a good workflow for updating your website, then you’ll have at least two or three copies of your website. One is on your “local” computer that only you can access. A second one for “staging”, where you test all the updates and get approval from key people, and a third, which is the live site.
Keeping these sites in sync, while protecting the live site, and allowing content writers, marketers, etc. to do their thing while the developers update and fix the site is important. some of the challenges are outlined below:
Keeping Multiple Developers in sync: When two developers are working on the same project, there needs to be a way to keep their code in sync. This problem is exasperated in WordPress because the design and features can sometimes be stored inside the database. Sometimes blog articles or pages will have CSS styles attached to them or “blocks” that make up the design, which may be in the database, rather than inside the code.
Ecommerce orders are stored in the DB. In WordPress and WooCommerce, product purchases (orders) are stored inside the database, so it’s critical that the live database is never overwritten by the staging or local database. At the same time, your local and staging environments need to send their updates to the live environment, and since those changes are sometimes in the DB, we need a way to sync the databases without erasing anything in production.
Plugins and Themes also have stuff in the Database. Plugins and themes have settings that can affect the design and functionality of a website, and those settings may be stored in the database too. These themes may be developed by third parties, so we need to ensure they’re able to be updated appropriately, and that those updates don’t break the website, while again keeping the settings in sync with the databases in all environments.
If you’re using templates or page builders, those settings, design, and content are often edited on the live site by stakeholders and the marketing team. Keeping those changes in sync with development can also be important.
Third Party code is everywhere: Core, Plugins, and Themes each have their own code bases, each nested within the single main repository that makes up your WordPress site, so if you’re a developer, trying to figure out how to mange your “version control” can be difficult as well.
This article is an attempt to lay out a strategy that takes into account all of these variables so we can easily manage and migrate WordPress websites. If you’re a developer, then check out our version control article.
Getting Started with WordPress Migrations:
Once you get a feel for the process, it doesn’t matter what plugins are used or how you handle the process. This post isn’t about specific tools; It’s about how to migrate a WordPress site at a high level.
Note: I have yet to find a plugin that “just works”. It seems like there’s always some kind of problem that needs troubleshooting. I’ll be using WP Migrate DB Pro in this example, but again, use the tools and systems that work for you. Here’s a list of tools I’m currently using for this process:
Creating backups:
- ManageWP
- Hosting provided backups
Migration Tools:
- WP Migrate DB Pro
Importing & Exporting:
- Default import / export tool
- WP All Import (if necessary)
Local Development Environment:
- LocalWP
Note 2: There is unfortunately no “standard” process for migrations between “Live”, “Local”, and “Staging” environments. How it should be done is going to be dependent on the size of your team, who has access to what, and how your themes and plugins are structured. A website built on Elementor may be different than a site built with a custom theme. Understanding the key issues is going to be necessary to develop a strategy of your own.
Migrating from Website “A” to Website “B”.
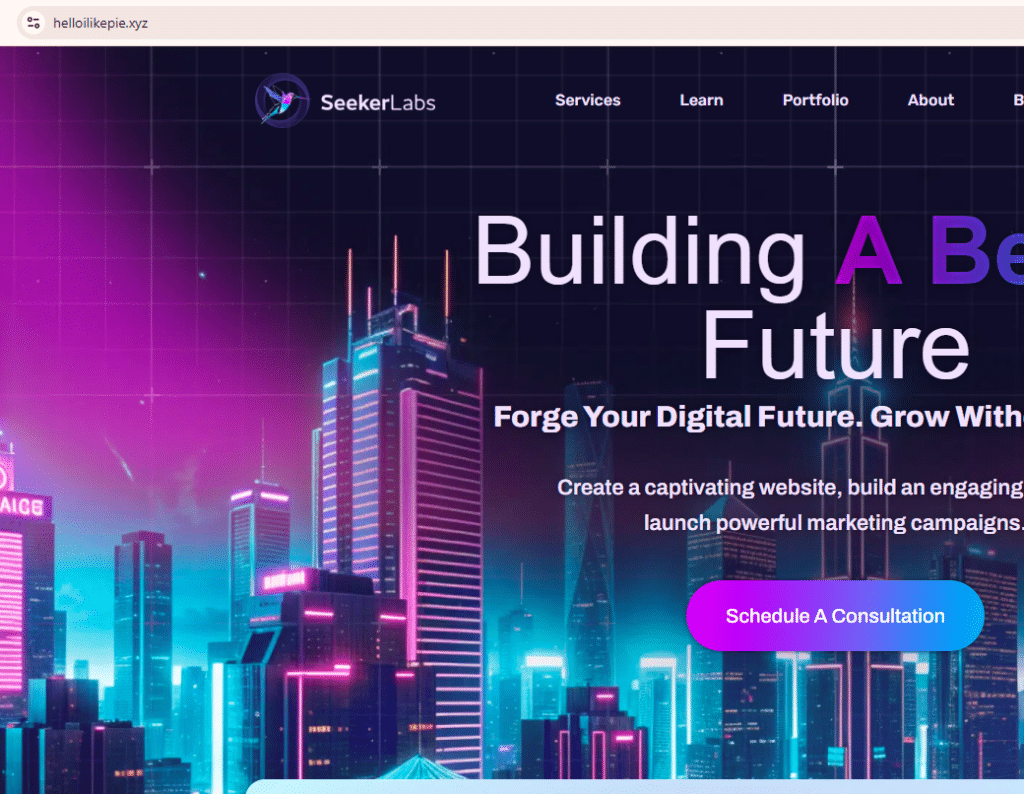
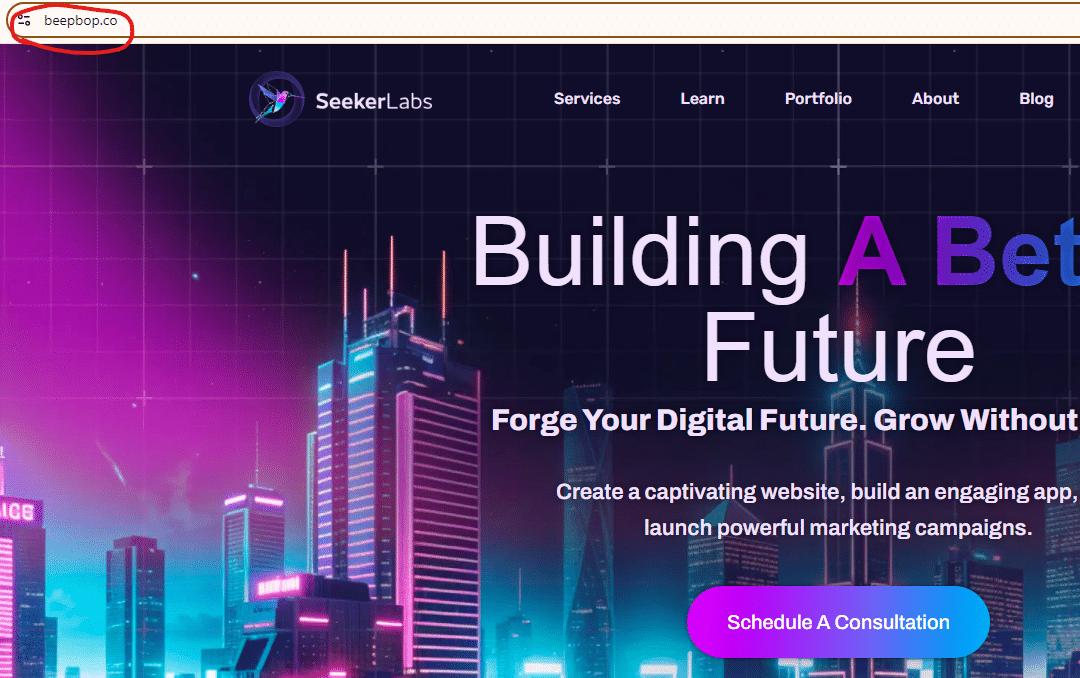
In this section we’re going to take a website at one of my testing domains helloilikepie.xyz, and move it to it’s new location: beepbop.co
High level Overview: Since we’re moving a website from one location to another permanently, we just need to migrate the entire site once, and then import the database (with the import/export tool) to make sure any new orders, signups, etc. are synced in case there was activity on the site during the migration.
Step 1: Create a Backup
I use ManageWP to create backups on a daily schedule for my WordPress websites. You’ll want to make sure you have backups of both websites in case something goes wrong. Most hosting plans have a package that automatically backs up for you as well, so however you back up your site is up to you. Check out my Backing up WordPress content if you want help with backing up a site.

Step 2: Install blank website & migration plugin:
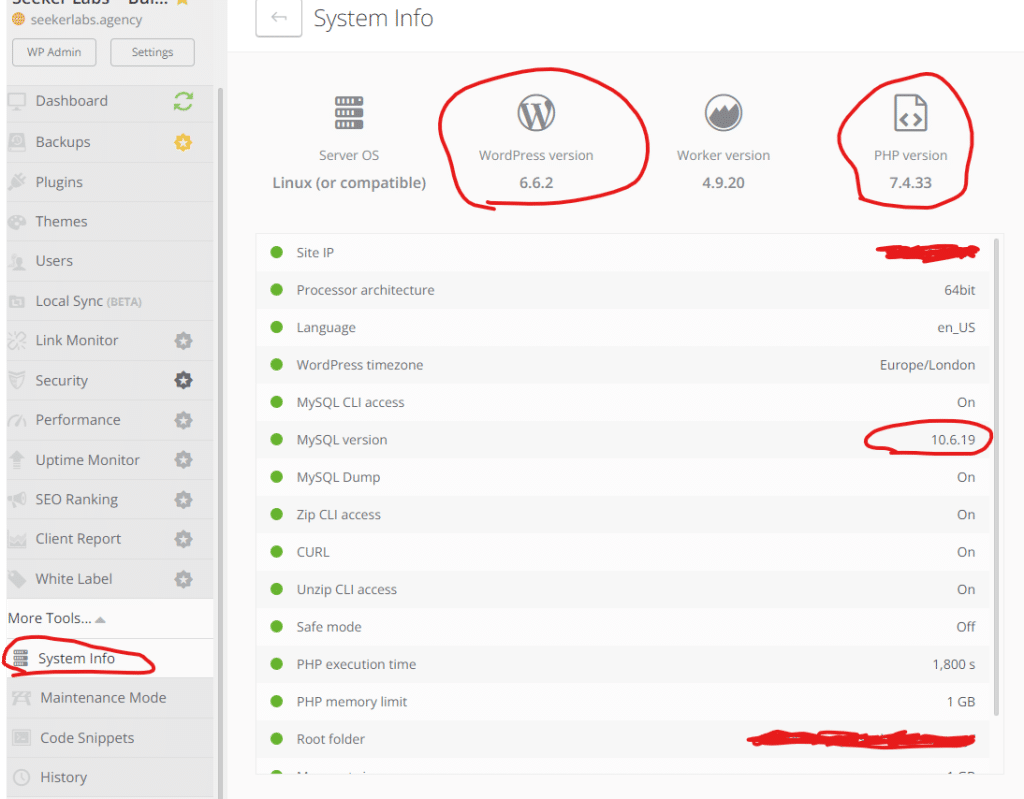
If you’re using a plugin to handle migrations then you’ll want to install a blank website at the target install location. It helps to keep the staging and live sites as close as possible to identical. Same PHP version, same web server, same WordPress version, etc. You can quickly find out most of that information in ManageWP by checking out the “System Info” tab:
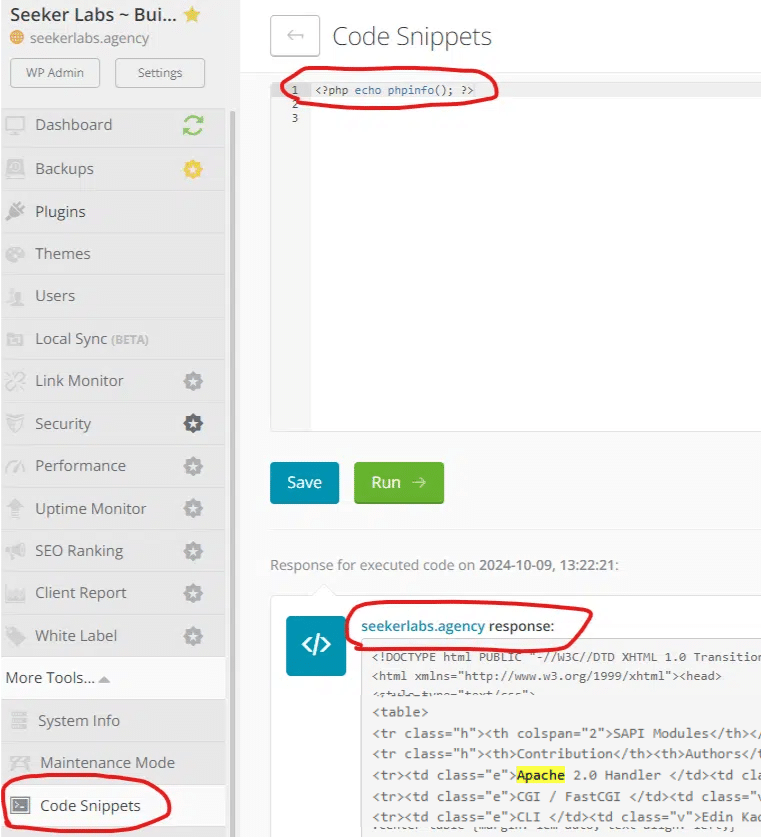
In the code snippets, you can run <?php echo phpinfo(); ?> and then CTRL + F for any information you’re looking for:
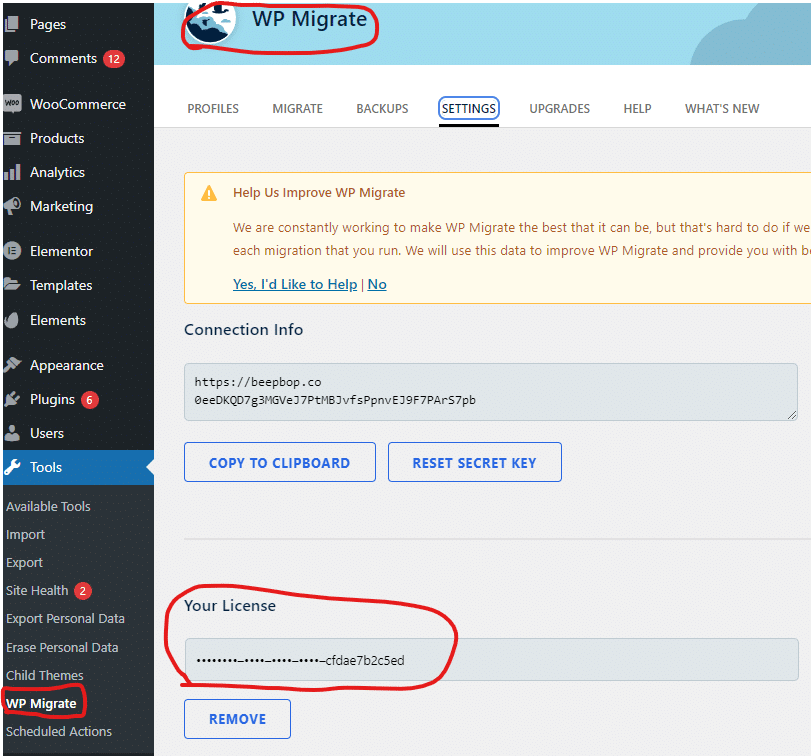
Once the site is running, then install the plugin you’re using to run the migration, such as Duplicator Pro, WPVivid, etc. on both sites. I’m using WP Migrate DB Pro, so I’ll install that on both websites and add my license key.
Step 3: Configure Plugin & Run Migration
Now that a blank install (and some unnecessary dummy content) is on the target website, and the plugin is installed on both sites, you’ll need to complete steps specific to the plugin of your choice. Here’s a comparison of the target (new) site and the old site before running the migration:
Target Website

Old Website
High Level Overview: The end goal here is to just move the entire website over to the new domain. If you need help, check out some of my reviews of popular tools that do this.
For my specific case, with WP Migrate DB Pro, I need to do the following:
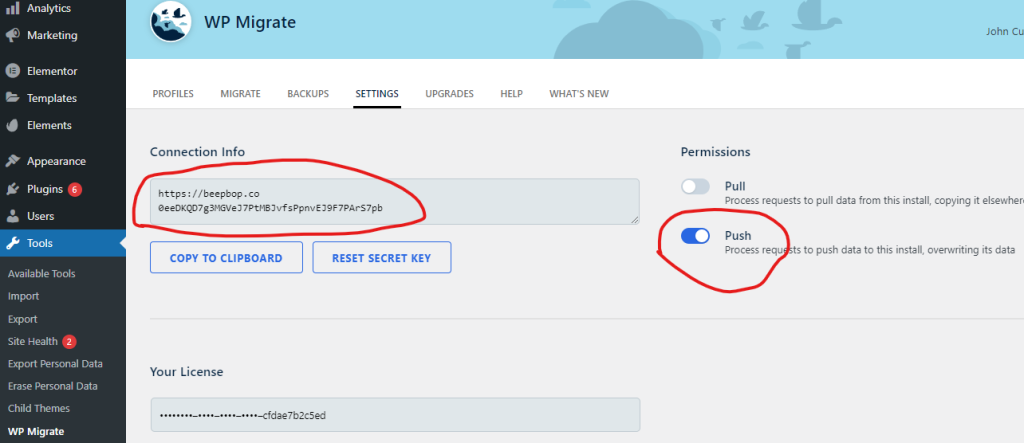
In the NEW url, Grab the connection string by Clicking Tools > WP Migrate > Settings tab > then copying the “connection info”. In addition to copying the connection info, toggle “Push” to ON:
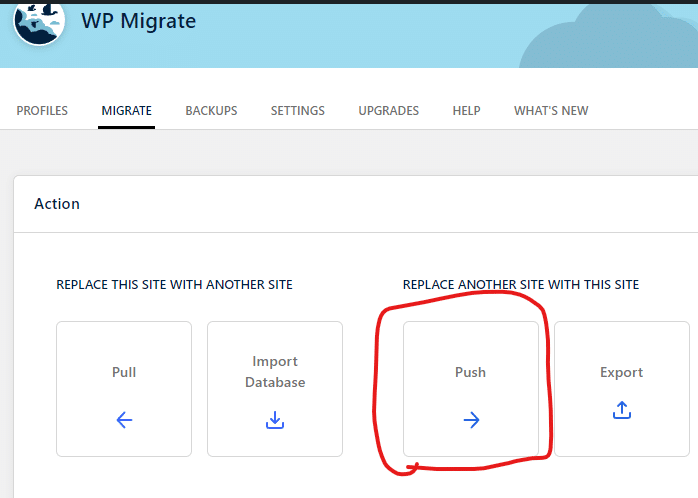
In my OLD url, click Tools > WP Migrate > Migrate tab > “Push” (Under “Replace another site with this site”)
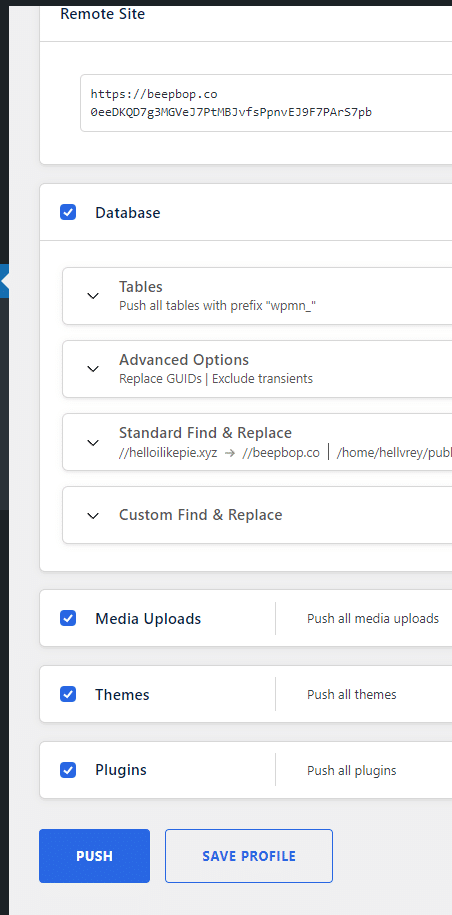
Enter the connection string you copied from the NEW URL, select what you wish to migrate, and PUSH: WP Migrate DB Pro handles the URL find and replaces by default, in the “Standard find & Replace” section.
NOTE: You will have to look around in each section and edit the migration for your specific needs. Because I do software development and website tutorials, I talk about migration plugins. This particular plugin excludes media files with the name wp-migrate-db-pro, So I need to make sure those files are included, which is why I’ve added this line of code to the excluded files section:
!*wp-migrate-db-pro-*.*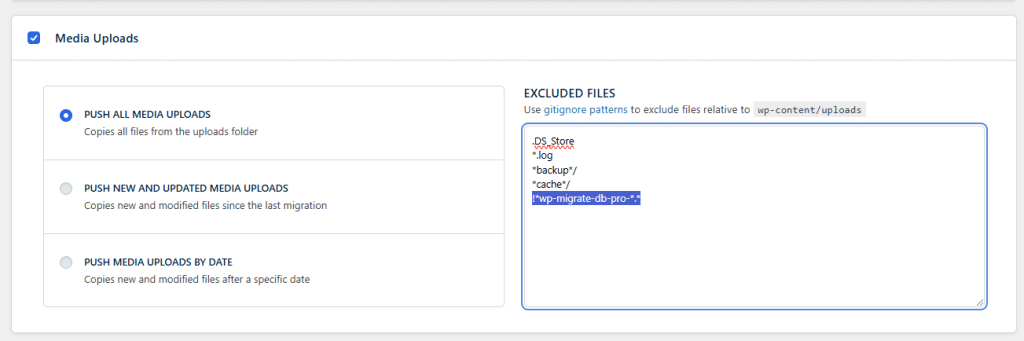
Step 4: Verify the new site works (click around too)
If all goes well, the new site should be an exact copy of the old site, but with the new URL in place of all the old urls. If not, you’ll need to troubleshoot. Again, problems with migration and backup plugins are common and troubleshooting steps are unique to your situation.
Target Website
Old Website
Step 5: Data Synchronization & conflict resolution:
Now that the site is working on the new URL, you’ll want to consider a few things.
Did anything change on the old or new site during or after the migration? If you have a busy site, something may have changed while the site was being migrated. If that’s the case, you’ll want to make sure that no data is left behind or overwritten. You can handle the data synchronization in a few ways:
- Use a maintenance page to prevent anyone from using the site during migration so you don’t have to worry about it.
- Lock down editable portions of the site so nothing can be edited or purchased during migration.
- Communicate with the team about what is allowed to be edited during the process to avoid difficulties.
- Deal with the merge conflicts like we’re about to do.
- Maybe something else I haven’t thought of.
Programmatically handling change conflicts like Git does for developers is hard, and I’m still seeking out solutions. For now, importing is a decent solution.
Once the website is initially migrated, redirect all users away from the old url. You don’t want any new data going to that old website.
Next, we’re going to export the data from the old site, and import it to the new site. Any updates on the old site during the transition will be exported. I’ve made a couple changes to the blog post titles on both the old site and new site as a test.
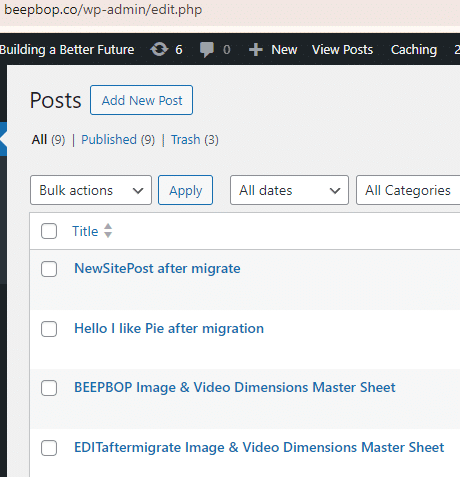
On the new site, I added a post with the title “NEWSitePost after migrate”, and edited the existing post to have “BEEPBOP” in the title.
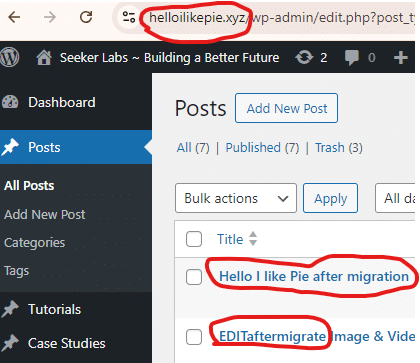
On the old site, I added a post “Hello I like pie after migration” as the title, and edited the existing post below it to have the word “EDITaftermigrate” to it.
This means my “image & video dimensions” post has a conflict between the new and old websites, and there’s now a post on both the new and old site that don’t exist on the other site.
New site content
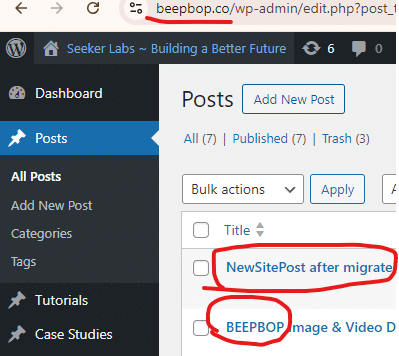
Old site content
There’s a variety of ways to prevent and resolve data conflicts in WordPress, and none of them are great. In this case, we’re going to export the old site content and import it into the new site, and manually take care of the conflicts.
By default, WordPress duplicates a post if there’s a noticeable change, and doesn’t overwrite anything else, and discards identical entries. So by importing the old site content, the new site content will not be erased, and the post with a conflict will end up becoming two posts, so the admin can decide how to merge things together.
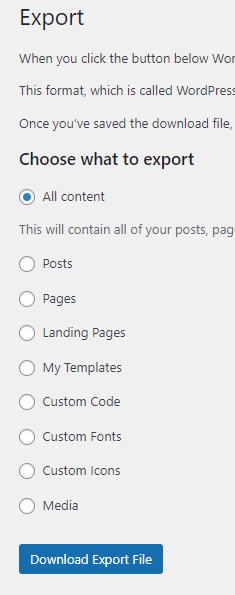
In the old site: Click Tools > Export > Select “All Content”, and click “Download Export File”
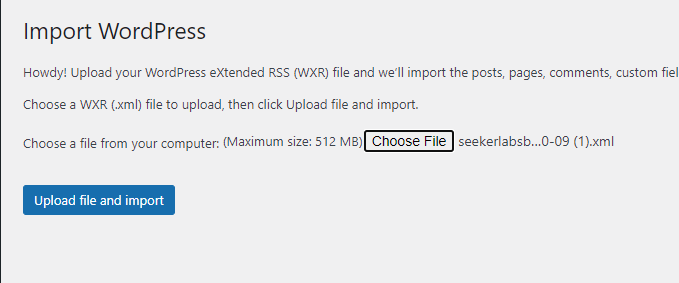
Then in the new site, Click Tools > import > under “WordPress”, click “Install Now” (if not installed) > “Run Importer” to run the WordPress importer. Choose the file that was downloaded, and click “Upload file and import”:
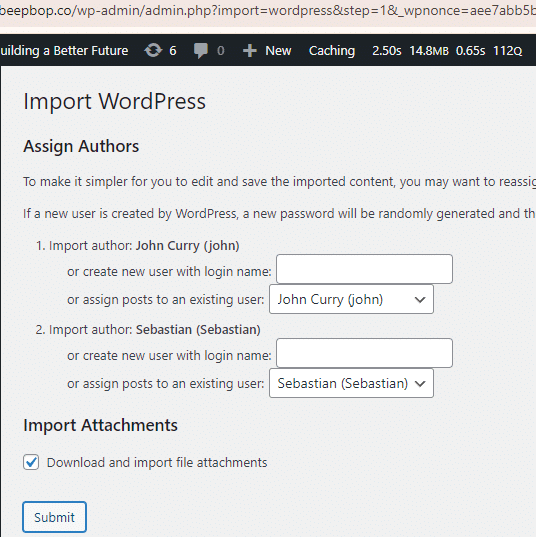
Next, assign all content to their owners:
Now you will have all the content up to date in your system, and you just have to deal with any merge conflicts in your site manually. In this example, I have two “image & video dimensions” posts, and two entirely new posts to handle:
That’s it! We can now delete the old site and carry on with the new one.
Dealing with the Database When doing WordPress Migrations:
Lots of information is stored in the database, which can make migrating in WordPress tricky. If a marketer goes in and changes the Google Analytics ID on the live site, that might be stored in the _options table.
Plugin settings, Theme settings, and Customizer settings may also go inside the _options table, or their own custom tables. This means if you change a setting then you run the risk of erasing changes when you migrate, regardless of where the changes are going when being migrated.
That’s why it’s best to come up with a standardized set of rules, such as “Only Posts and pages are created or edited in live, while every other change is made Locally first. Even small things like adding Google Analytics.”
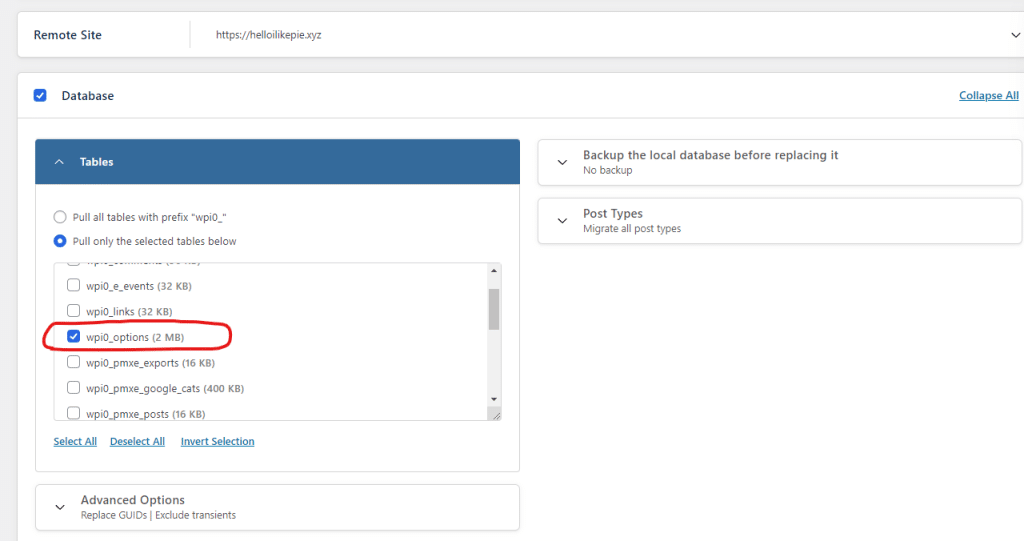
The best way I’ve found to deal with settings in the database is to only migrate the necessary tables. Usually, Theme settings, customizer settings, and plugin settings are stored in _options, so if we only migrate the _options table from local to production, then we’re only overwriting that single table while leaving all the new content updates on the live site unaffected.
With this strategy you’ll need to understand your website architecture though. If some plugins have their own tables or databases you’ll need to be aware of those and update your process accordingly. The below image is how we’re able to use WP Migrate DB Pro to migrate specific tables only:
The Media Library is also tied to the database. Simply migrating the media to a site won’t necessarily mean it shows up in the media library on the new site. The database has to have its corresponding records updated, which means you’ll likely find it easier to use the import/export tool to move media if you’re not planning on moving the whole database.
Keeping Production, Staging, and Development in Sync:
Having a standardized set of rules in places for your company is important in making sure data, content, and design remains in sync. Here’s a few ideas to keep things running smoothly:
Migrating from Production to Local: When you only have a live website, and you want to create a development environment for it, you’ll probably want to pull down everything. So a full backup and migration will work.
Subsequent Pulls from Production are probably not ideal, unless the cycle has been completed and you can wipe the local environment clean again without blowing away prospective changes.
If you need data from live, then EXPORT using the export tool or some import/export tool like WP All Import, and import that data from the generated xml file. do NOT overwrite the database.
If you’re doing design in Gutenberg / page builders, export/import. Sometimes designs are handled in page builders or Gutenberg, which you might be able to just use the import / export tool to move the page to a new environment, including when moving the post or page back up into live. If you’re using ACF you might need to run a migration with some tables.
If you really need database migrations, import/export only tables that are needed. This prevents you from destroying progress the development team has made. This requires clear communication with the team.
For Media, it’s probably best to use the import / export tool. See above note on how the Media library and the uploads folder are connected to the database.
Set rules & processes. For example, all theme, plugin, and customizer settings are updated locally, (even simple things like adding Google Analytics) which are then pushed to staging and then production.
Use staging to get multiple developers in sync. This won’t be as easy as managing git workflows, but using the staging site to get multiple developers in sync seems to be a reasonable solution. For example:
- “Urgent” request comes in, but current development tasks aren’t ready.
- Multiple developers carefully push prospective changes to staging, so all tasks are now synced in staging.
- Handle the urgent ticket locally.
- Create second staging environment(?) for urgent ticket.
- Test the ticket in the temporary staging environment.
- Once ready, push that to live, so urgent ticket is complete.
- Pull the urgent update from live to staging in a way that doesn’t erase the unpublished changes sitting in staging.
- All developers pull staging to their local environment, and are now in sync.
Using a combination of imports / exports, migrations, and different environments, a team should be able to stay in sync without erasing any updates.
Things to Look Into:
Some other things I haven’t gotten around to is seeing if there’s a database diffing tool. If there was a “Git” for databases, that would be really cool to be able to merge conflicts in a database. It might also make sense to convert the database to a file that CAN be processed by git, which would then be converted back to a database on an attempted migration.
We’re still a fairly new agency, so we haven’t looked into advanced build processes for themes and plugins yet, so we’ll have to circle back and update this post when we get to it.
This post will continue to be updated as we improve our own processes. In the meantime, this solution works for us, and hopefully it will work for you.